Can Spices in Coffee Boost Brain Health?
Spices like turmeric, cinnamon, and ginger contain bioactive compounds that researchers have linked to improved cognitive function, reduced inflammation, and slower brain aging. Adding them to your daily coffee is a simple way to get more of these compounds into your diet while upgrading your flavor.
 Quick start: The easiest combination to try first is ¼ tsp turmeric + a pinch of black pepper + a splash of oat milk. The pepper increases turmeric absorption by up to 2,000%.
Medical Disclaimer: This article is for informational purposes only and is not intended as medical advice. The research cited below is preliminary, and individual results may vary. Always consult your healthcare provider before making changes to your diet, especially if you take medications or have existing health conditions.
Coffee is one of the most widely consumed beverages on earth, and emerging research continues to reveal potential benefits for brain health. A 2026 study published in JAMA involving more than 130,000 participants found that moderate caffeine intake was associated with slower brain aging and a potentially reduced risk of dementia. A separate 2025 review in Frontiers of Nutrition examined coffee’s molecular compounds and highlighted coordinated antioxidant, anti-inflammatory, and neuroprotective effects.
But here is where it gets interesting. You may be able to amplify those potential benefits by adding certain spices to your daily cup. Spices like turmeric, cinnamon, and ginger have been studied for their own cognitive properties. When combined with coffee’s natural compounds, they may create a more powerful daily ritual for your brain.
In this guide, we cover what the current science says about nine spices that may support cognitive function, how to combine them effectively, and how to incorporate them into a healthy daily routine.
 Jump to Section:
 Key Takeaways at a Glance
| Spice |
Primary Potential Benefit |
Suggested Amount |
| Cinnamon |
Blood sugar regulation, antioxidant |
¼ to ½ tsp |
| Turmeric |
Anti-inflammatory (curcumin), BDNF support |
¼ to ½ tsp + pinch black pepper |
| Ginger |
Circulation, anti-inflammatory |
¼ tsp ground or thin slice fresh |
| Black Pepper |
Enhances nutrient absorption (piperine) |
Small pinch |
| Cardamom |
Antioxidant, circulation support |
¼ tsp or 1 crushed pod |
| Cayenne Pepper |
Circulation (capsaicin), alertness |
Tiny pinch (start small) |
| Nutmeg |
Mood support, antioxidant |
Small pinch (use sparingly) |
| Rosemary |
Memory support (acetylcholine) |
Small sprig or ¼ tsp dried |
| Sage |
Memory and mood support |
2 to 3 fresh leaves or ¼ tsp dried |
Note: These amounts are general suggestions for adding flavor to coffee. They are not standardized therapeutic doses. Research on spices and cognition is still emerging. Results from studies using concentrated extracts may not directly apply to culinary amounts.
The Foundation: How Coffee May Support Brain Health
Coffee contains hundreds of bioactive compounds, including caffeine, chlorogenic acids, and trigonelline. These compounds work in different ways. Caffeine blocks adenosine receptors that promote drowsiness. Chlorogenic acids function as antioxidants that may help protect cells from oxidative damage.
Research on coffee and cognitive health has been building for years. A landmark 2026 JAMA study analyzing data from over 130,000 people found an association between moderate coffee consumption and slower cognitive decline. Earlier research from the Journal of the American Heart Association also found that coffee drinkers with atrial fibrillation showed better cognitive performance, with inflammatory markers reduced by up to 27% in higher consumers.
Good to know: Most of this research is observational, meaning it shows associations rather than definitive cause and effect. Other lifestyle factors common among coffee drinkers may also play a role. Still, the consistency of findings across large studies is promising.
If you are interested in how coffee may support longevity more broadly, we have covered that topic in depth as well.
 9 Spices That May Enhance Your Coffee and Support Cognitive Health
Each of these spices has been studied for properties that may benefit brain health. Some evidence is stronger than others, and we have tried to be transparent about the quality of research behind each one. Where possible, we have cited systematic reviews and meta-analyses, which represent the strongest form of evidence.
1
 Cinnamon
Cinnamon adds a warm, naturally sweet flavor to coffee and is one of the most studied spices for metabolic health. Its primary relevance to brain health comes through blood sugar regulation. Chronically elevated blood sugar is associated with impaired cognitive function and a higher risk of dementia.
What the research says: A 2024 systematic review in Nutritional Neuroscience examined 40 preclinical and clinical studies on cinnamon and cognitive function. The review found that cinnamon and its bioactive compounds may influence brain function and behavior, though only two of the studies reviewed were clinical trials in humans. Separately, a 2025 umbrella review of meta-analyses confirmed that cinnamon supplementation can meaningfully improve glycated hemoglobin and blood sugar markers in people with metabolic conditions. This has indirect but important implications for brain health.
 How to use it: Add ¼ to ½ teaspoon of ground cinnamon to your coffee. Ceylon cinnamon (“true cinnamon”) contains less coumarin than cassia cinnamon and may be a better choice for regular use.
 Safety note: Cassia cinnamon contains coumarin, which can affect the liver in large amounts. Some experts advise keeping cassia cinnamon intake under 2 grams per day for prolonged use. If you take diabetes medications, consult your doctor. Cinnamon may further lower blood sugar.
2
 Turmeric
Turmeric brings a warm, earthy flavor and a golden color to your coffee. Its primary active compound, curcumin, has been one of the most extensively researched natural substances for neuroprotection. If you enjoy ginger turmeric shots, you are already familiar with this powerful combination.
What the research says: A 2025 meta-analysis in Frontiers in Nutrition pooling 9 randomized controlled trials with 501 subjects found that curcumin supplementation significantly improved global cognitive function compared to placebo. The review identified an optimal dose of 0.8 grams per day, with benefits most significant after 24 or more weeks. A separate 2024 systematic review in Cureus analyzing 12 studies found curcumin significantly improved working memory across multiple adult groups. Researchers believe curcumin may work through anti-inflammatory pathways, gut-brain axis modulation, and potential increases in brain-derived neurotrophic factor (BDNF).
Important caveat: Curcumin has notoriously poor oral bioavailability. Your body absorbs very little of it on its own. Pairing turmeric with black pepper (which contains piperine) may increase absorption significantly. The amounts used in clinical studies are also typically far higher than what you would add to a cup of coffee. Culinary amounts may offer more modest effects.
How to use it: Add ¼ to ½ teaspoon of ground turmeric to your coffee along with a pinch of black pepper and a splash of your preferred non-dairy milk. Fat helps with absorption. This makes a simple golden coffee.
Safety note: Turmeric may interact with blood thinners. If you take any medications regularly, talk to your doctor before adding large amounts to your daily routine.
3
Ginger
Ginger adds a bright, spicy kick to coffee and has a long history of use in traditional medicine. It is well established as an anti-inflammatory and antioxidant, and preliminary research suggests it may also support cognitive function.
What the research says: A 2012 study in Evidence-Based Complementary and Alternative Medicine found that ginger extract improved attention and cognitive processing in middle-aged women. Ginger’s gingerol compounds are thought to support brain health through anti-inflammatory effects and by potentially increasing blood flow to the brain. More recent research within the 2025 nutraceuticals review in IJMS classifies ginger alongside turmeric and cinnamon as herbs with documented neuroprotective potential, though the authors emphasize that more clinical trials are needed.
How to use it: Add ¼ teaspoon of ground ginger or steep a thin slice of fresh ginger in your coffee. Ginger pairs especially well with turmeric. Try combining them for a warming, anti-inflammatory coffee.
4
 Black Pepper
Black pepper might seem like an unusual coffee addition, but even a small pinch serves an important purpose. Its active compound, piperine, is a bioavailability enhancer that may help your body absorb other beneficial compounds more effectively.
What the research says: A 2022 review in Frontiers in Nutrition found that piperine has its own neuroprotective properties, including antioxidant effects and the ability to modulate neurotransmitter levels. Piperine is most commonly studied for its ability to enhance the bioavailability of curcumin from turmeric by up to 2,000%. That makes it an essential companion if you are adding turmeric to your coffee.
How to use it: Add a small pinch of freshly ground black pepper to any coffee that contains turmeric. The flavor impact is minimal, but the absorption benefit may be significant.
5
Cardamom
Cardamom is a staple in traditional Middle Eastern and South Asian coffee preparations, adding a floral, slightly sweet complexity. It is rich in antioxidants and provides small amounts of vitamin C, magnesium, potassium, and zinc.
What the research says: A 2019 review in the Journal of the Science of Food and Agriculture documented cardamom’s antioxidant, anti-inflammatory, and potential neuroprotective properties. Some preclinical evidence suggests it may help prevent the accumulation of amyloid-beta plaques associated with Alzheimer’s disease. However, human clinical data is limited.
How to use it: Add ¼ teaspoon of ground cardamom or crush one whole pod and steep it in your coffee. It pairs beautifully with cinnamon for a chai-inspired flavor. If you enjoy this combination, you might also like our
chai vanilla collagen smoothie.
6
 Cayenne Pepper
A tiny pinch of cayenne pepper in coffee creates a surprising warmth that complements dark roasts well. Cayenne’s active compound, capsaicin, is known for boosting circulation.
What the research says: A 2022 review in Nutrients examined capsaicin’s effects on brain health and found evidence of antioxidant and anti-inflammatory properties, along with the potential to improve cerebral blood flow. Better blood flow to the brain means better delivery of oxygen and nutrients to brain cells. The research is still mostly preclinical, so the effects in humans remain to be confirmed.
How to use it: Start with a tiny pinch. Far less than you think you need. Cayenne is potent, and a little goes a long way. It combines well with cinnamon and a touch of honey for a Mexican-inspired mocha flavor.
7
 Nutmeg
Nutmeg adds a warm, slightly sweet, nutty depth to coffee. It is commonly used in holiday drinks but works beautifully year-round.
What the research says: A 2014 review in the Journal of Medicinal Food documented nutmeg’s potential effects on mood and cognitive function through modulation of neurotransmitters including serotonin, dopamine, and acetylcholine. Nutmeg also contains myristicin, which has shown antioxidant properties in preclinical studies.
How to use it: Freshly grate a small amount directly into your coffee. Pre-ground nutmeg works too, but fresh has significantly more flavor and aroma.
Safety note: Nutmeg should always be used sparingly. In large amounts (more than 1 to 2 teaspoons), nutmeg can cause nausea, dizziness, and other adverse effects due to myristicin. A small pinch in coffee is well within safe limits.
8
Rosemary
Rosemary might sound unusual in coffee, but its piney, herbal notes can add an unexpected sophistication, especially to lighter roasts. Of all the spices on this list, rosemary may have some of the most interesting research behind it for memory specifically.
What the research says: A 2022 review in Frontiers in Nutrition examined rosemary’s cognitive effects and found evidence that its compounds may improve memory and concentration. The mechanism may involve raising acetylcholine levels, a neurotransmitter critical for learning and memory. Some research also suggests rosemary may improve blood flow to the brain, enhancing oxygen and nutrient delivery.
How to use it: Steep a small sprig of fresh rosemary in your hot coffee for 2 to 3 minutes, then remove. Or add ¼ teaspoon of dried rosemary. It pairs well with sage for a memory-supporting herbal coffee.
9
 Sage
Sage
Sage rounds out our list with its woody, slightly peppery profile. Like rosemary, sage has a traditional reputation as a “memory herb” that modern research is beginning to explore.
What the research says: A 2005 study in Physiology & Behavior found that sage essential oil improved memory and mood in healthy young adults. Sage is thought to work by inhibiting acetylcholinesterase, the enzyme that breaks down acetylcholine. This keeps more of the memory-related neurotransmitter available in the brain. Some evidence also suggests sage may influence BDNF levels, though this research is still early-stage.
How to use it: Add 2 to 3 fresh sage leaves or ¼ teaspoon of dried sage to your coffee. Like rosemary, fresh is preferable for flavor. Steep and remove before drinking.
 Spice Combinations for Synergistic Effects
Some spices work better together than alone. Here are three combinations worth trying, based on complementary mechanisms.
Golden Coffee: Turmeric + Black Pepper + Ginger
This is arguably the most evidence-backed combination on this list. Black pepper’s piperine dramatically increases curcumin absorption from turmeric, while ginger adds its own anti-inflammatory compounds and a bright, spicy flavor.
Spiced Mocha: Cinnamon + Nutmeg + Cayenne
A classic warming combination. Cinnamon provides blood sugar support, nutmeg adds mood-enhancing depth, and cayenne boosts circulation.
Try this: Use a teaspoon of cinnamon, a small pinch of nutmeg, and a tiny dash of cayenne with oat milk and honey. This also makes a great base for
spiced apple cider coffee in the fall.
Herbal Memory Blend: Rosemary + Sage
Both rosemary and sage may support acetylcholine levels, the neurotransmitter most closely associated with memory and learning.
Try this: Steep a small sprig of rosemary and 2 to 3 sage leaves in your coffee, then remove. Add coconut milk and a drop of stevia for a fresh, herbal experience.
 The Gut-Brain Connection: Why It Matters for Your Coffee
Emerging research suggests that many of the cognitive benefits attributed to both coffee and spices may operate partly through the gut-brain axis. This is the bidirectional communication pathway between your digestive system and your brain. Curcumin, for instance, has been shown to influence cognition through gut microbiome modulation. Ginger has well-documented effects on digestive health that may indirectly support brain function.
This is why pairing spiced coffee with broader gut health practices may amplify benefits. Including probiotic-rich foods and prebiotic foods in your diet supports the microbial balance that helps your gut and brain communicate effectively.
For a deeper dive into this topic, see our guide on improving gut health and the benefits of digestive enzymes.
 Mindful Consumption: Tips for Getting the Most from Spiced Coffee
 Choose quality spices. Organic, recently purchased spices will contain higher levels of active compounds than older, lower-quality alternatives. When possible, buy whole spices and grind them yourself. Look for single-origin spices without fillers or additives.
Start small and adjust. Begin with small amounts and increase gradually as your palate adjusts. Some spices, especially cayenne and nutmeg, are potent and easy to overdo. Pay attention to how different spices make you feel.
Balance with a nutrient-rich diet. Spiced coffee is a complement to a healthy diet, not a replacement for one. Support your brain health with foods rich in omega-3 fatty acids, B12, magnesium, and antioxidants from fruits and vegetables.
Consider your caffeine intake. The brain health benefits associated with coffee in research typically correspond to moderate consumption of roughly 3 to 4 cups per day. More is not necessarily better. Excessive caffeine can cause anxiety, sleep disruption, and other issues. If you are caffeine-sensitive, you might enjoy these spices in coffee alternatives or even in green tea, which offers its own cognitive benefits with less caffeine.
Be aware of interactions: Some spices can interact with medications. Cinnamon and turmeric may affect blood sugar levels. This is important if you take diabetes medications. Turmeric may also interact with blood thinners. If you take any medications regularly, talk to your doctor before adding large amounts of spices to your daily routine.
 Lifestyle Habits That Support Long-Term Brain Health
Adding spices to your coffee is one small piece of a larger picture. Research consistently shows that cognitive health depends on a combination of diet, physical activity, mental stimulation, sleep, and stress management.
Move your body regularly. Physical activity is one of the most well-established ways to support brain health. Even small amounts matter. Research suggests that just five minutes of daily exercise may help lower dementia risk. Activities that combine physical movement with coordination, like dancing, may be especially beneficial for cognitive function.
 Prioritize sleep. Your brain consolidates memories and clears metabolic waste during sleep. Poor sleep is strongly associated with cognitive decline. If you struggle with sleep, our guides on sleeping better naturally and good sleep hygiene may help.
 Manage stress effectively. Chronic stress can impair cognitive function and accelerate brain aging. Find stress management techniques that work for you. We have compiled practical ways to reduce stress and techniques for calming anxiety at night. Adaptogenic herbs like ashwagandha are also gaining research support for stress management.
 Challenge your brain. Mental stimulation helps build cognitive reserve that may protect against decline. The goal is to regularly engage in activities that feel slightly challenging rather than purely routine.
For a more comprehensive look at how daily habits influence brain health and aging, see our article on lifestyle and lifespan.
 More Spiced Beverage Ideas
If you enjoy adding spices to your coffee, you might also want to explore these related recipes and ideas:
The Bottom Line
The research connecting coffee, spices, and brain health is genuinely interesting, and it is growing. Large-scale studies continue to find associations between moderate coffee consumption and slower cognitive decline. Individual spices like turmeric, cinnamon, and ginger are building their own evidence base for neuroprotective properties.
That said, it is important to keep expectations realistic. Adding a pinch of cinnamon to your morning coffee will not cure or prevent any disease on its own. What it can do is contribute to a broader pattern of healthy choices (good nutrition, regular movement, quality sleep, and mental engagement) that collectively support your brain over time.
The best part? These spices also make your coffee taste better. So even setting the science aside, there is a strong flavor argument for experimenting with spiced coffee. Start with what sounds appealing, adjust to your taste, and enjoy the ritual. Your brain and your taste buds may thank you for it.
For more ideas on supporting your overall wellness, explore our healthy habits guide, 9 must-have herbs for cleansing the body, and our guide to MCT oil benefits (another popular coffee addition).
Disclaimer: This article is for educational purposes only and is not intended to diagnose, treat, cure, or prevent any disease. The information provided is not a substitute for professional medical advice, diagnosis, or treatment.
Always seek the advice of your physician or other qualified health provider with any questions you may have regarding a medical condition. Never disregard professional medical advice or delay in seeking it because of something you have read in this post.
The post How to Spice Up Your Coffee and Boost Brain Health appeared first on Better Living.


 Anxiety link is real — CO2 sensitivity is a hardwired biological alarm. Research shows anxiety hormones rise in mammals at 700–1,000 ppm, a level your home regularly hits.
 Your blood chemistry is shifting — A new study of 70,000+ Americans found bicarbonate levels rising steadily since 1999, tracking atmospheric CO2 increases.


 Please Note: Eggs dyed this way are not edible. The fabric dyes are not food-safe. If you would like to keep your eggs year after year, use blown-out eggs instead. We cover that below!
 Quick Glance
 Active Time: 30 minutes |
  Cook Time: 20 minutes |
  Cool Time: 20 minutes
 Skill Level: Easy |
  Great for kids! (wrapping is the best part)
 Best with: White eggs |
  Fabric: Must be 100% silk. No exceptions!
 STEP 3: WRAP IN WHITE FABRIC
 STEP 5: COOL AND UNWRAP
 Pro Tip — Where You Tie Matters! The pattern transfers most clearly on the opposite side from your knot. If you are displaying eggs upright in an egg cup, tie at the top of the long end. If you want the design showing on the side in a bowl or nest, wrap the egg horizontally before tying.
 Complete Your Easter Table!

 Why You Will Love These Easter Cupcakes
 Perfect For:
 The Four Components You Need
 1. The Bunny Feet Cookies — small oval no-sugar sugar cookies dipped in white chocolate with pink bunny toe details piped on top


 Carbs
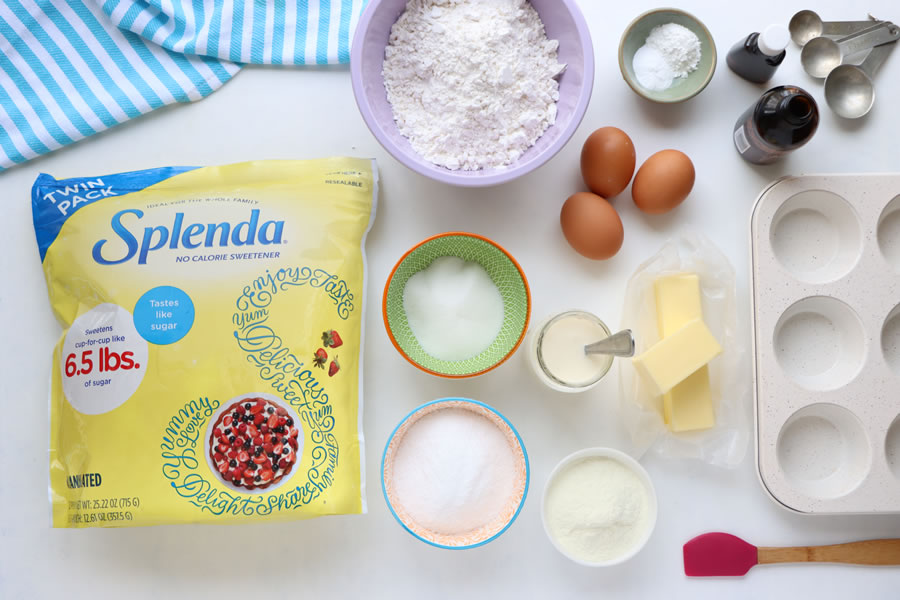
Carbs Ingredients
 Instructions
 Part 5: Decorate and Assemble the Bunny Butts
 Frequently Asked Questions